Creating a parting line:
-the original is placed on a mold board and wood blocks are placed just below the decided parting line
-3 or 4 balls of soft water clay are wrapped in plastic and placed under the original for support and protection (notice one of the clay balls under the rider's left shoulder

Creating a parting line:
-a water clay wall placed on the blocking at the level of the parting line

Creating a parting line:
-a plaster wall the same level of the water clay making the parting line approx. 2” wide

Creating a parting line:
-shellac is put on the plaster wall as a sealer and to act as a visual guide when making the mother mold

First clay blanket:
-moist paper toweling is placed over the original and then a 1/4” clay blanket is placed over the toweling.
-keys, vents and a pour cup are are also made

First mother mold:
-a plaster mother mold is made over the clay, leaving the pour cup exposed (the shellac on the parting line is used as a reference when making the edge of the mother mold)

The entire mold is turned over exposing the underside of the parting line

The parting line is removed exposing the edge of the first mother mold and clay blanket

Keys are cut into the edge of the mother mold and then shellaced. The oil clay pour spout and vent blanks can be seen in the first clay blanket. These will make the pour spout and vents to cast in when the rubber mold is finished

Second clay blanket:
-moist paper toweling is placed over the oil clay original

Second clay blanket, keys, vents and pour cup

Second mother mold with pour cup exposed

First poured rubber:
-the first mother mold is removed exposing the original, first clay blanket and the oil clay blanks for the pour cup and vents

First poured rubber:
-the underside of the first mother mold after the clay is removed

First poured rubber:
-the parting line for the first pour is finished off and the keys are cut

First poured rubber:
-a paint coat of rubber is put on the original to capture all the detail and where the clay parting line meets the original to seal the seam

First poured rubber:
-the underside of the first mother mold is scraped and steel wooled to smooth the surface, then a thin layer of vasaline is rubber into the surface to release it from the first poured rubber

First poured rubber:
-here is the void left by the first clay blanket which will be filled with rubber (the plaster end cap has been removed to show this and will be reattached to pour the first rubber)
 First poured rubber:
-the first rubber has been poured. PVC pipe is used for the pour spout and vent
 Second poured rubber
 The first mother mold is removed exposing the first poured rubber
The first rubber is removed and seated into the first mother mold (notice the pour spout and vents left by the oil clay blanks)

The second mother mold and rubber are removed from the original and fitted together.....
the mold is finished!


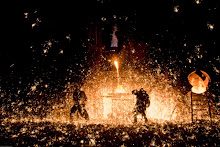
Thanks for showing the mold creation process. I must look at the photos and captions again when I am more alert!! Also, thx for the lost-wax demo at St. Gaudens' home in Cornish. I had never seen the pouring of molten metal into a mold, though I had done plaster casting years ago during art school at the University of Connecticut.
ReplyDeleteThanks for showing the mold creation process. I must look at the photos and captions again when I am more alert!! Also, thx for the lost-wax demo at St. Gaudens' home in Cornish. I had never seen the pouring of molten metal into a mold, though I had done plaster casting years ago during art school at the University of Connecticut.
ReplyDelete